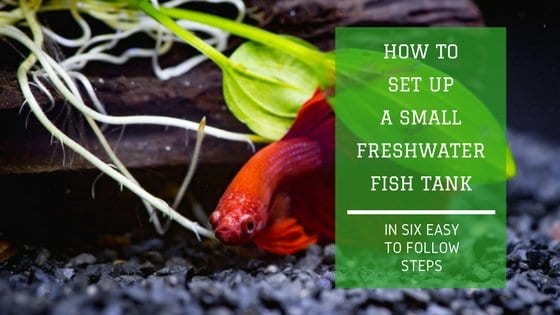
Small freshwater aquariums (2-10 gallons) are one of the most accessible ways to start fishkeeping. They cost less than larger setups, fit on a desk or countertop, and modern all-in-one designs make maintenance straightforward. The key to success is understanding that small tanks require more attention to water quality than large aquariums — less water means waste concentrations rise faster.
This guide walks you through six steps to set up a thriving small freshwater fish tank, from choosing the right location to long-term maintenance.
Quick Overview
Setting up a small freshwater fish tank involves choosing the right location, selecting appropriate equipment, properly cycling the water, and following careful fish stocking guidelines. The first 30 days are critical for establishing the nitrogen cycle — the biological process that keeps your fish alive by converting toxic ammonia into safer compounds.
Step 1: Pick the Perfect Location
Aquarium placement directly affects water temperature stability, algae growth, and long-term tank health. Choosing the right spot before purchasing your aquarium prevents costly problems later. For a deeper look at placement strategy, see our complete guide to fish tank placement.
Location Considerations
- Weight capacity: Water weighs approximately 9 pounds per gallon. A 3-gallon tank with gravel, decorations, filter, and lighting weighs at least 30 pounds. A 10-gallon tank exceeds 100 pounds fully set up
- Electrical access: Heater, filter, and light all require power — use a quality power strip with surge protection
- Temperature stability: Avoid locations near windows, heating vents, air conditioners, or exterior doors. Temperature swings stress fish and can be fatal in small volumes of water
- Away from direct sunlight: Sunlight promotes rapid algae growth and can overheat a small tank by several degrees
- Stable, level surface: The stand or table must support the full weight without wobbling. An uneven surface puts stress on glass seams and can cause leaks
Step 2: Choose Your Aquarium and Equipment
Small freshwater aquariums range from budget-friendly rectangular glass tanks to sleek all-in-one systems with built-in filtration, heating, and LED lighting. Browse our best small fish tank recommendations for specific models.
Tank styles:
- Basic rectangular or square tanks — Budget-friendly and easy to maintain. More surface area than tall tanks, which means better gas exchange for fish
- Bowfront tanks — Curved front glass creates visual depth and appeal
- All-in-one kits — Built-in filtration, heating, and LED lighting for clean aesthetics with no visible equipment
Choosing the Right Filter
Filtration is the single most important piece of equipment for a small freshwater fish tank. Two types work well in nano setups:
- Sponge filters — Gentle water flow, ideal for betta fish and shrimp tanks. Powered by an air pump, they provide both mechanical and biological filtration
- Hang-on-back (HOB) filters — Stronger flow and easier cartridge replacement, better suited for community tanks with multiple fish species
For more guidance, see our best aquarium filter recommendations and filter setup guide.
Choosing Substrate
The substrate you choose affects which fish and plants you can keep:
- Gravel — The most common choice. Easy to clean with a siphon, available in many colors and sizes. Use fine gravel (2-5mm) for the best results
- Sand — Required for bottom-dwelling fish like corydoras catfish, which can injure their barbels on coarse gravel. Harder to vacuum but creates a natural look
- Planted substrate — Nutrient-rich substrates like Fluval Stratum or ADA Amazonia support rooted plant growth. Worth the investment if you plan a planted tank
Add 1-2 inches of substrate depth regardless of type.
Step 3: Setting Up the Aquarium
Follow each step in order — once filled, the tank is too heavy to reposition
Follow this sequence for proper setup. For a broader overview, see our guide on how to prepare an aquarium.
Setup Sequence
Position the aquarium
Place the empty tank in your selected location. Once filled with water and substrate, it will be too heavy to move safely.
Rinse and add substrate
Rinse gravel or sand thoroughly with tap water to wash away dust and fine particles, then spread 1-2 inches across the tank bottom. Skip rinsing nutrient-rich planted substrates — they're designed to release nutrients gradually.
Add hardscape and plants
Place rocks, driftwood, and decorations first to establish your layout. Then add live plants if using them — java fern and anubias attach to hardscape, while stem plants root into the substrate.
Fill with water
Pour water slowly over a plate or your hand to avoid disturbing the substrate. Fill 3/4 full, make final adjustments to your layout, then fill completely.
Install the heater
Position the aquarium heater near the filter outflow for even heat distribution. Set the temperature to 75-78°F. Allow 24 hours for the water temperature to stabilize.
Set up filtration
Assemble and install your aquarium filter according to manufacturer instructions. A properly sized filter is essential — in small tanks, waste concentrations rise quickly.
Add water conditioner
Treat the water with a dechlorinating conditioner to neutralize chlorine and chloramines. Never add untreated tap water — chlorine kills beneficial bacteria and harms fish.
Set up lighting and run equipment
Install your LED light on a timer set to 8-10 hours daily. Let the heater, filter, and light run for at least 24-48 hours before adding fish to ensure everything works and the temperature stabilizes.
For detailed heater setup instructions, see our guide on how to use an aquarium heater.
Adding Live Plants
Live plants are one of the best investments for a small freshwater fish tank. They absorb nitrates (reducing water change frequency), produce oxygen, outcompete algae for nutrients, and provide shelter that reduces fish stress.
Beginner-friendly plants that thrive in small tanks without CO2 injection:
- Java fern and anubias — Attach to rocks or driftwood. Don’t bury the rhizome in substrate
- Java moss — Grows on any surface, creates natural texture
- Floating plants — Provide shade and absorb excess nutrients directly from the water column
See our full guide to low-light aquarium plants for more options.
Understanding the Nitrogen Cycle
Before adding fish, you need to understand the nitrogen cycle — the single most important biological process in any aquarium. Skipping this step is the #1 cause of fish deaths in new tanks, a problem known as new tank syndrome.
The nitrogen cycle works in three stages:
- Ammonia — Fish waste and uneaten food produce ammonia, which is highly toxic to fish even in small amounts (above 0.25 ppm)
- Nitrite — Beneficial bacteria called Nitrosomonas colonize your filter media and convert ammonia into nitrite, which is equally toxic
- Nitrate — A second group of bacteria (Nitrobacter) convert nitrite into nitrate, which is far less harmful and removed through regular water changes
This entire process takes 3-6 weeks to establish naturally. You can speed it up by adding a commercial beneficial bacteria starter when you first fill the tank.
Fishless Cycling Is Safest
The safest approach is to cycle your tank before adding fish. Add a bacteria starter, let the filter run for 2-4 weeks, and test water daily with an aquarium test kit. Your tank is cycled when ammonia and nitrite both read 0 ppm and nitrate is detectable. This means the beneficial bacteria colonies are established and can process waste safely.
If you add fish before the cycle completes, keep the bioload extremely low (1-2 small fish) and test water daily. Perform immediate 20-30% water changes whenever ammonia or nitrite exceeds 0.25 ppm.
Step 4: Choosing and Adding Your First Fish
Float the bag for 15-20 minutes to equalize temperature before releasing fish
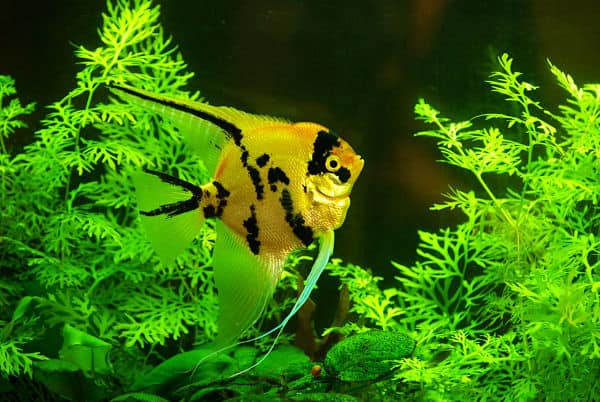
Choosing the right species is just as important as setting up the tank correctly. Not all freshwater fish thrive in small aquariums — many common species like goldfish, angel fish, and common plecos grow far too large.
Best Fish for Small Freshwater Tanks
5-gallon tanks:
- Betta fish — The most popular choice. One male betta per tank, optionally with cherry shrimp or nerite snails. See our betta tank mates guide for compatible species
- Ember tetras — Peaceful schooling fish with vibrant orange color. Keep a group of 5-6
- Celestial pearl danios — Striking spotted pattern, ideal for planted nano tanks. Keep 5-6
- Cherry shrimp — Hardy, colorful, and fascinating to watch. A colony of 10+ thrives in a planted 5-gallon tank
10-gallon tanks:
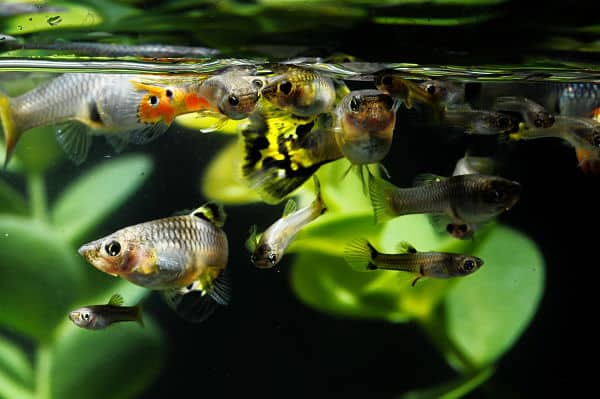
- Neon tetras — Classic schooling fish. Keep 8-10 for the best visual effect
- Guppies — Colorful and active. Keep 1 male to 2-3 females to manage breeding
- Corydoras catfish (panda or pygmy) — Peaceful bottom-dwellers that help clean the substrate. Keep in groups of 4-6
- Endler’s livebearers — Smaller and hardier than guppies, excellent for beginners
Don't Overstock
Adding too many fish overwhelms the biological filter. Start with just 2-3 fish and wait 2-3 weeks before adding more. This gives the beneficial bacteria time to grow and handle the increasing waste load. Avoid overfeeding — uneaten food decomposes into ammonia.
How to Acclimate New Fish
Proper acclimation prevents temperature and water chemistry shock, which can stress or kill fish:
- Float the sealed bag in your aquarium for 15-20 minutes to equalize the water temperature
- Open the bag and add a small cup of tank water every 5 minutes for 15-20 minutes. This gradually adjusts the fish to your tank’s pH and hardness
- Net the fish out of the bag and gently release them into the tank. Discard the bag water — don’t pour pet store water into your aquarium, as it may contain diseases or parasites
- Keep lights dim for the first few hours to reduce stress. Most fish will hide initially and begin exploring within a day
Feed sparingly for the first week — once daily, only as much as fish consume within 2-3 minutes.
Step 5: The Critical First Month
The first 30 days determine long-term success for any small freshwater fish tank. Ammonia and nitrite levels fluctuate as the nitrogen cycle establishes, so consistent monitoring is essential.
First Month Management
- Test ammonia, nitrite, and nitrate at least twice per week using an aquarium test kit
- If ammonia or nitrite exceeds 0.25 ppm, perform a 20-30% water change immediately
- Water may become cloudy for 1-2 weeks — this bacterial bloom is normal and clears on its own
- Don't drain and restart the tank — this kills beneficial bacteria and resets the nitrogen cycle
- Feed once daily in small amounts. Uneaten food decomposes into ammonia
- Watch for signs of stress: gasping at the surface, clamped fins, lethargy, or loss of color
- Always treat tap water with dechlorinating conditioner before adding to the tank
After the first month, ammonia and nitrite should consistently read 0 ppm. At this point the nitrogen cycle is established and you can gradually add more fish — no more than 2-3 at a time, with 2-3 weeks between additions.
For more on dealing with cloudiness during this period, see our guide to cloudy aquarium water.
Step 6: Ongoing Aquarium Care
Regular maintenance keeps a small freshwater aquarium healthy and visually appealing. Small tanks have less water volume to dilute waste, so consistent care matters more than in larger setups.
Weekly tasks:
- Water changes: Perform 10-20% water changes weekly. This is the single most important maintenance task for small tanks
- Glass cleaning: Wipe algae from the inside glass with an algae scraper or magnetic cleaner
Monthly tasks:
- Filter maintenance: Rinse filter media in a bucket of old tank water (never tap water — chlorine kills beneficial bacteria). Learn how to change filters without losing bacteria
- Gravel vacuuming: Use a small gravel siphon to remove organic waste from the substrate
- Decoration cleaning: Remove ornaments and gently scrub with a soft brush if algae accumulates
- Water testing: Check ammonia, nitrite, nitrate, and pH levels monthly once the tank is established
For a complete breakdown of tank cleaning procedures, see our guide on how to clean a fish tank.
Keys to Long-Term Success
The three most common causes of failure in small freshwater tanks are overfeeding, overstocking, and inconsistent maintenance. Feed small amounts once daily, stock conservatively, and perform weekly water changes. A well-maintained 5-gallon planted tank with a betta fish or a school of nano fish can thrive for years with minimal effort.
Conclusion
Setting up a small freshwater fish tank is straightforward when you follow these six steps: choose the right location, select appropriate equipment, set up properly, understand the nitrogen cycle, stock gradually with compatible species, and maintain consistently. The initial setup takes a few hours, but the patience you invest in cycling and slow stocking pays off with a healthy, beautiful aquarium that brings life and tranquility to your space.
How many fish can I put in a small tank?
For a 5 gallon tank, a single betta fish or a small group of 5-6 nano fish like ember tetras is appropriate. For a 10 gallon tank, you can keep 8-12 small fish like neon tetras with a few corydoras catfish. Always start with just 2-3 fish and add more gradually over several weeks to avoid overwhelming the biological filter.
Why is my new fish tank water cloudy?
Cloudy water in a new aquarium is normal and typically clears within 1-2 weeks. This bacterial bloom occurs as beneficial bacteria colonize the filter and establish biological filtration. Don't drain and restart — this stresses fish and restarts the cycling process. Continue normal maintenance and the water will clear naturally.
How long should I wait before adding fish to a new tank?
Run all equipment for at least 24-48 hours before adding fish. Allow the heater to stabilize water temperature at 75-78°F. For best results, cycle the tank for 2-4 weeks using a beneficial bacteria starter to establish the nitrogen cycle before introducing fish. Test ammonia and nitrite levels — both should read 0 ppm before adding fish.
How often should I change water in a small fish tank?
Perform 10-20% water changes weekly for small tanks under 10 gallons. Small tanks accumulate waste faster than large aquariums because there is less water to dilute toxins. Always treat tap water with conditioner to remove chlorine before adding to the tank.
Do I need a heater for a small fish tank?
Most tropical freshwater fish require water between 75-80°F, which is warmer than typical room temperature. An adjustable aquarium heater rated at 3-5 watts per gallon maintains stable temperatures and prevents stress from overnight temperature drops. Only cold-water species like white cloud mountain minnows can thrive without a heater.
Can I put live plants in a small fish tank?
Live plants are one of the best additions to a small freshwater fish tank. Plants like java fern, anubias, and java moss absorb nitrates, produce oxygen, reduce algae growth, and provide hiding spots for fish. These species grow in low light and don't require CO2 injection or special substrate.
Found this helpful?
Share this guide with your fellow aquarium enthusiasts!

Written by
FTW Team
The FishTankWorld editorial team brings together experienced aquarists to help you succeed in the hobby.